Working on a Macbook is a wonderful experience because of its speed and amazing features. But the best part is that it can be enhanced further by using some basic hacks that speed it up even more, making it highly productive.
A Mac is known to be a fast and powerful computer. This doesn’t mean it can’t slow down over time. There are various reasons why your Mac may not be performing as well after some time. This may be due to something simple such as not having enough free space. You may struggle to perform certain tasks or install macOS updates. In this article, you can find some simple ways to gain more space and make your Mac quicker and more responsive.
1. Remove Unused Apps
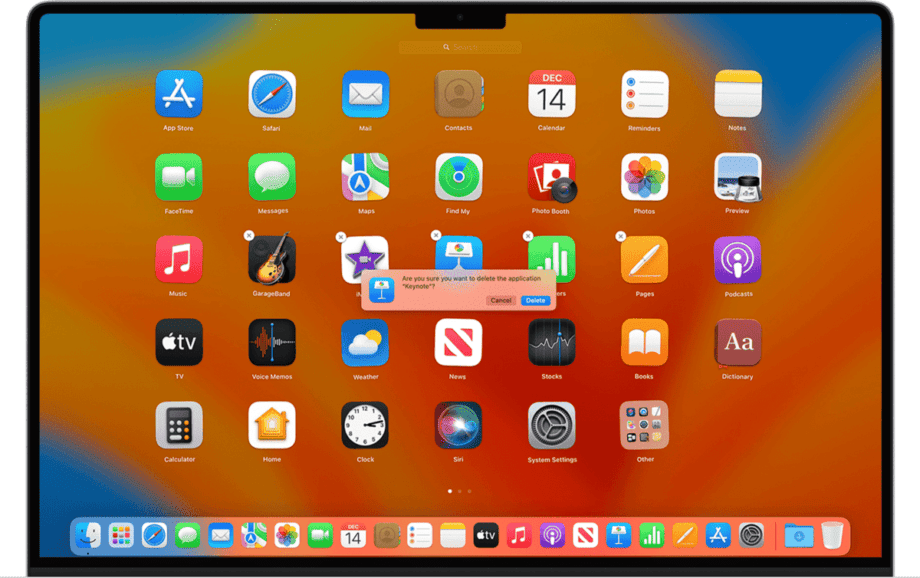
Uninstalling or deleting apps you no longer use can free up much space. You can delete apps using “Launchpad” or “Finder”.
- Click “Launchpad” in the Dock or open it from the “Applications” folder.
- If you can’t see the app you want to delete, type its name in Launchpad search to find it.
- Press and hold the “Option” key.
- Click the “Delete” button next to the app.
- Click “Delete” again to confirm the action.
Image source: Apple.com.
The “Delete” button in “Launchpad” will only appear next to apps you downloaded from the App Store. You can delete the other apps using “Finder”.
- Open a “Finder” window.
- Go to “Applications” in the sidebar.
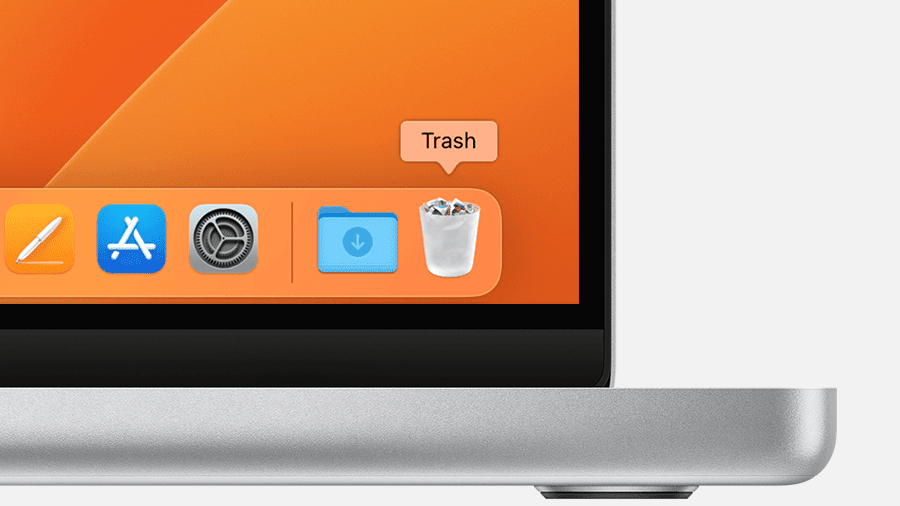
- Locate the unwanted app and drag it into “Trash”.
- “Empty” the “Trash”.
This article has described how to free up space on a MacBook. You can find out more about deleting unwanted applications through it. For example, you will learn how to delete all hidden app leftovers that may still be lingering on your Mac.
Related: 5 Ways to Recover Data from a Dead MacBook – Let’s Find Out!
2. Restart Your Mac
Most of us tend to close our Macs and let them sleep rather than restart them. Restarting more often reduces the strain on apps, software, processors, and hard drives. Leaving your Mac running means the caches aren’t cleared, and apps don’t shut down. Restarting your Mac will clear the cache, processes running in the background, and resource-hungry apps will close.
3. Update Your Software
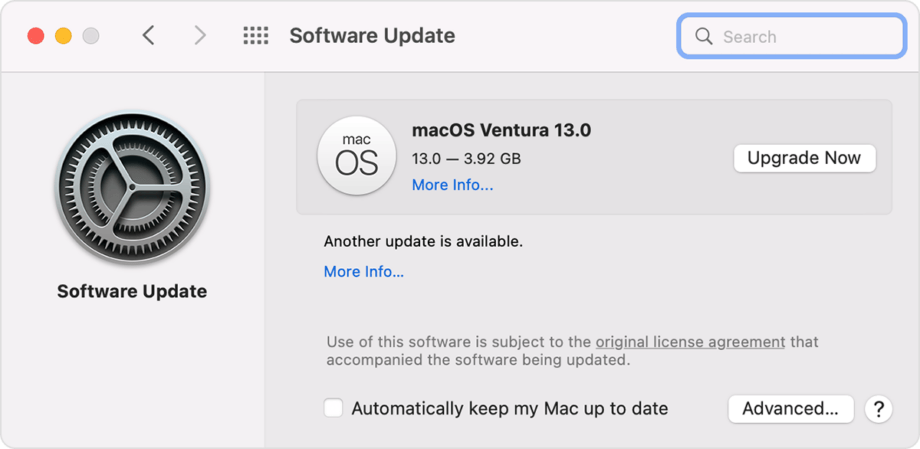
Regularly updating the macOS and Applications on your Mac is a must. Apple issues macOS system updates regularly. If you have a recent macOS version, open “System Preferences” and click on “Software Update”. Your Mac will check for updates for you to install.
Image source: Apple.com.
Open the “App Store” and click on “Updates” for the apps you have downloaded. You can enable “Automatic Updates” in the App Store’s “System Preferences”. Enabling “Automatic Updates” will ensure automatic updates of apps.
You must update apps you didn’t download from the App Store separately. If you click on the program’s name in the “Menu” bar, you will usually see a “Check for Software Update”. Developers often tweak their apps to improve efficiency and speed, so it’s important to use the latest version.
4. Make Sure Enough Space is Free
You won’t find a defragmenting option on your Mac like on Windows computers. This is because it has safeguards that prevent files from fragmenting. However, at least 10 percent of disk space must be available for optimal operation of your Mac. Offloading some larger files may be necessary to free up enough space. On a Mac, there are various ways to find out how much space is available.
To check your storage space, go to the main “Apple Menu” > “System Settings” > “General” > “Storage”.
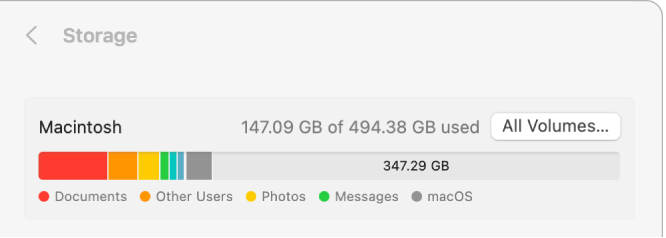
Image source: Apple.com.
You will see a graph that shows available and used storage space. Moving the pointer across the different colors shows the amount of space each category takes up. Categories include:
- Documents.
- Apps.
- System Data (caches and temporary files).
- macOS.
If you don’t like what you see, click “Manage” to do some housekeeping. In the “Recommendations” section, you will find some options to help optimize storage. This includes automatically emptying the Trash and automatically removing Apple TV movies or TV shows once you have watched them.
System junk can easily build up and slow down your Mac. This may include temporary files, cache files, system logs, and unused folders. It can be difficult to remove it all as it is located in many different places. There are top tech tools available from third parties that make removing all the junk easy. Just make sure to use an Apple notarized tool.
5. Empty the Trash and Downloads Folders
It’s surprising how much space you may gain simply by emptying your “Trash” and “Downloads” folders. They may contain many unwanted DMG files, unnecessary large files, and zip archives.
- Open “Finder” > “Downloads”.
- Select “Sort” by “Size” and you will see all the files in order of size.
- Check which large items you don’t need and send them to “Trash”.
- “Empty” the “Trash”.
Image source: Apple.com.
It helps to empty the “Trash” automatically on Mac. You can use a scheduled option to make sure your Mac auto-deletes your “Trash” once a month. Open “Finder” > “Preferences” > “Advanced” and check “Remove items from the Trash after 30 days”.
See also: Top 10 Amazing Features in macOS Sierra.
6. Free Up Your MacBook’s RAM
In the past, a solution for speeding up a MacBook was to add more RAM. It wasn’t that difficult to add more RAM to an old Mac. This isn’t a solution for the most modern Macs where memory is built onto the chip. The best advice for buying a good laptop is to choose one with as much RAM as you can afford.
To see how much RAM your Mac is using:
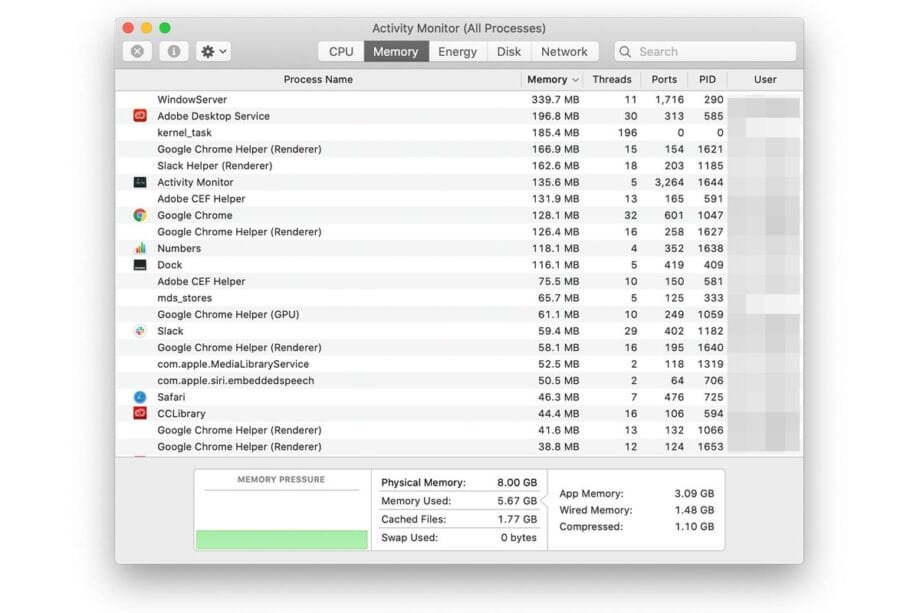
- Open “Activity Monitor” and click on “Memory”.
- At the bottom of the window, you will see how much RAM the MacBook is using.
- Click on the “Memory” column to see the biggest users of RAM.
- Some apps may stand out as large RAM users. You can free up RAM by closing the RAM-hungry apps you don’t use. Right-click on the apps and choose “Quit”.
Image source: lifewire.com.
7. Deal with iCloud Syncs
Another area where storage space can be unexpectedly consumed is through iCloud syncs – particularly, with photos.
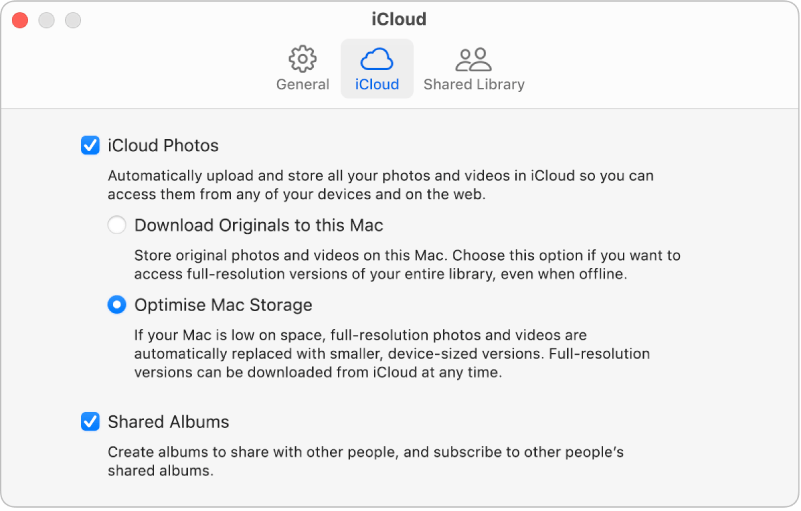
If you’re using iCloud for your photos, keep in mind that it doesn’t mean you can delete them from your Mac. To ensure that iCloud Photos don’t occupy too much space on your Mac follow these steps:
- Open the “Photos” app.
- Go to “Preferences”.
- Click on the “iCloud” tab.
- Enable the “iCloud Photos” > “Optimize Mac Storage” option.
Image source: Apple.com.
By enabling this setting, you can optimize storage when your Mac is running low on space. It stores full resolution photos in the cloud while keeping low resolution copies on your Mac. If you ever need access to the full resolution versions, you can still download them from iCloud.
It’s worth noting that having photos syncing in the background can slow down your system. If you’re using iCloud Desktop, try not to store large documents on it.
Additionally, consider changing where you save your screenshots. Saving only necessary documents on the desktop will help improve performance speed. If you prefer not to sync images or want to turn off iCloud Photos on your device, be cautious about opening the app.
8. Force Quit Apps You Don’t Use
It’s a practice to force quit apps that are not in use as they consume system resources unnecessarily. Check your Dock for applications. Those with a dot underneath, indicate they are currently open. You can close them by right clicking on them. If they don’t close, you’ll need to force quit them.
- Click on the “Apple” icon at the top-left corner and choose “Force Quit”.
- Select the application you want to close and click on “Force Quit”.
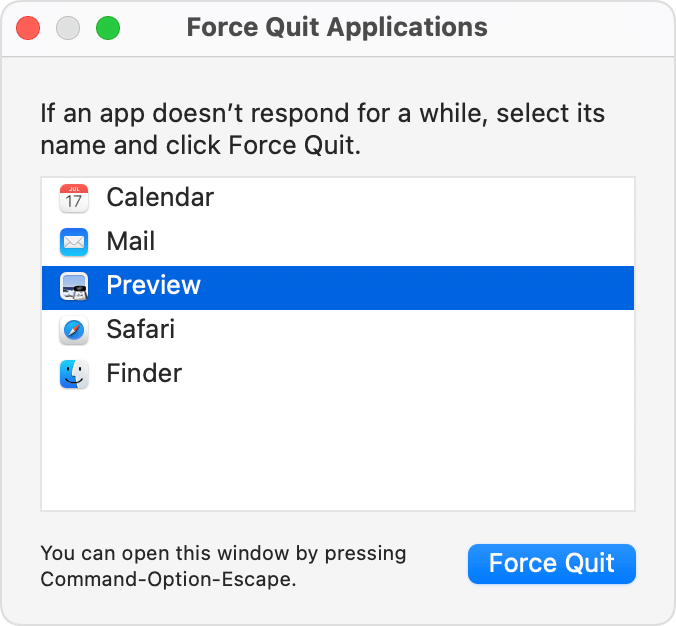
Image source: Apple.com.
9. Turn Off Visual Effects
Visual effects may look nice. But they won’t help you get your work done. Certain effects might be slowing down your Mac.
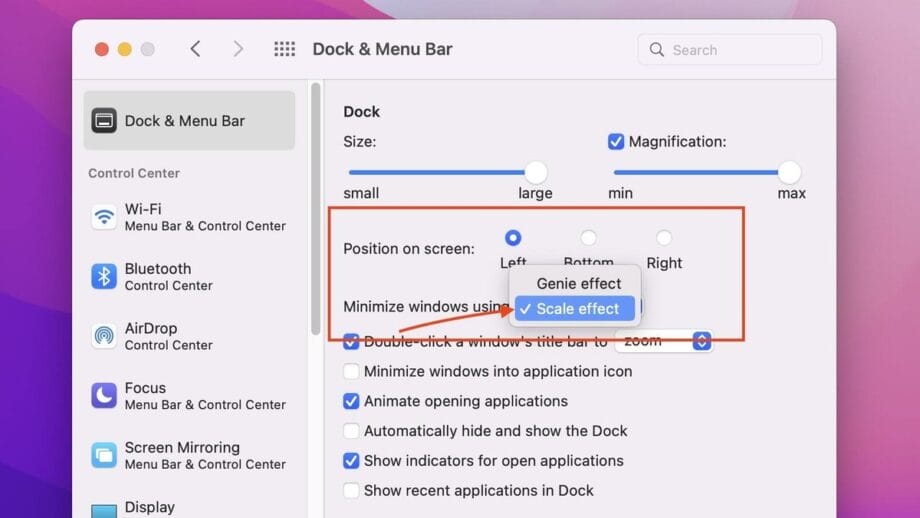
Go to “System Preferences” > “Dock & Menu Bar”. In the “Minimize windows using” dropdown section you can switch from the “Genie effect” to the “Scale effect”. Then uncheck the following options:
- “Animate opening applications”.
- “Automatically hide and show the dock”.
Image source: digitaltrends.com.
10. Keep a Tidy Desktop
Each file on your desktop is like a window with an image inside it. The contents are stored in RAM. The more files you have on your desktop, the more RAM your Mac uses, which could slow it down. Organizing files into proper user folders can make a huge difference.
Starting from macOS Sierra, sorting desktop files into Stacks happens automatically. Everything is filed in folders based on their kind or date. To set up Desktop Stacks, if you haven’t already done so, simply click on “Desktop”, then select “View” and then choose “Use Stacks” from the menu.
Related: 11 Common MacBook Problems and Methods to Solve Them.
Conclusion

There’s no need to rush into buying a new Mac if your current one starts slowing down. There usually isn’t a sinister reason behind a Mac performing slowly. It is often due to too much clutter. Luckily there are some fairly simple steps you can take to address this issue. The aforementioned tips will help you to optimize your Mac’s performance by getting rid of unwanted apps and ensuring your desktop remains organized.
