With more and more vloggers making YouTube videos, there is a high demand for a video editor that they can use for free, and which has all the basic and advanced features that they want in making their videos look more cinematic and stunning. VideoProc Vlogger is one such free-to-download video editing software that lets video creators make video editing a fun exercise. With its clean and user-friendly UI and a host of features, VideoProc Vlogger is one of the best video editing software out there on the internet. Whether newbies or experienced video creators – VideoProc Vlogger can be used by anybody, whether they are new to video editing or are seasoned pros in making YouTube videos and vlogs.
Features of VideoProc Vlogger
Let’s find out the main features of VideoProc Vlogger.
Recommended for you: Top 10 Best Camcorders (Digital Video Cameras).
1. User-friendly UI

Newbies to editing videos for YouTube will find the UI in VideoProc Vlogger very fluid and interactive. Users will be able to access all features without having to navigate too much for them. They will see all of them in a single glance. A little exploration by themselves will give them an idea of the various features and where to access them in the UI. Menus are well set and self-explanatory.
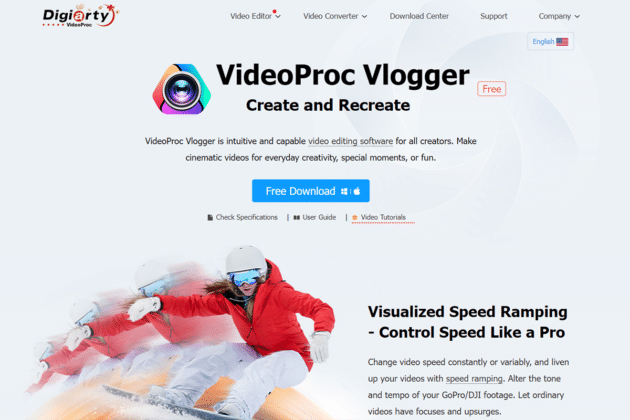
2. Visual Speed Ramping

VideoProc Vlogger allows a more fluid speed ramping. The transition between slow motion and normal speed videos gets smoother with visualized speed ramping in VideoProc Vlogger. There are 20 speed presets that users can apply to their videos. Users also have the advantage of keyframing the Bezier curve graph (wiki), so that videos do not get split, and they can speed up or slow down the video at specific keyframes.
3. Creative Motion Effects

Users will now be able to edit videos like a pro in VideoProc Vlogger. They can apply such creative effects as Tilt, Roll, Dolly, Truck to their videos. They can create cinematic vlogs by giving push-in/out and close-up shots to their videos. There are other effects too like rotation, zoom, shakes which make the video look stunning.
4. Cinematic Motion Presets

Users can add motion trails to their videos and make them look more cinematic. VideoProc Vlogger has 20 motion presets that will make the video appear more original than the first shot. With dynamic cropping and reframing, users can edit their videos more easily. Users can be more creative with their images with lens burn effect and pan and zoom. They can change motion path and frame size, add rotation angle, and make smooth transitions.
5. Color grading and color correction

Users who are new to video editing need not worry about color theory when editing videos in VideoProc Vlogger. With 3D LUTs and filters, they can edit color saturation, contrast, exposure and make photos and videos look dynamic. There are more advanced color options like noise reduction, fixing over-exposed photos, grainy images, etc. that users can try their hand at in VideoProc Vlogger.
6. Studio-grade Audio-editing

VideoProc Vlogger allows users to edit audio tracks like a seasoned audio professional. 10-band Audio Equalizer allows users to adjust frequency bands. They can apply sound effects through various modes.
7. Advanced Video Editing

With VideoProc Vlogger users can now play with different features like removing fisheye, extracting audio from audio tracks, recording their voiceovers, adding text effects, creating time-lapse videos, split-screen video effects, and more. This makes video editing enjoyable and there is unlimited fun when editing videos for YouTube.
Preparation before creating videos in VideoProc Vlogger
Before preparing to create videos in VideoProc Vlogger users have to do the following preparation:
- Transfer video clips, audio, images, into a folder on the computer.
- Study the panels and the UI of VideoProc Vlogger. The main interface of VideoProc Vlogger has options like:
- VideoProc Menu: Here users can check updates, check UI language, change settings, and manage the project.
- Media Library: Users can import various media files like audio, images, videos, into the Media Library. They can also check out other menu options like transitions, effects, titles.
- Preview Panel: Users can check the real-time progress of their video editing.
- Toolbar: All the editing tools of VideoProc Vlogger are in this toolbar.
- Timeline: Here there are various timelines where users can import tracks like audio, video, overlay, effect, subtitle.
- Inspector: Users can change the properties of their videos here.
Steps to create a video using VideoProc Vlogger
Let’s find out the steps that can help you to create a video using VideoProc Vlogger:
Step 1 – Create a new project
Users have to download VideoProc Vlogger free software. Once it is downloaded users have to make a new project by clicking on the New Project button. In the panel, they can customize their project as they want. They can alter the project name and location. They can choose the video resolution they want. Most common video resolutions for YouTube videos are 3840 X 1080 [16:9] [4K] for YouTube, 2160 X 3840 [9:16] [2K]. Users can change these resolutions later. Also, change the frame rate for high-quality video and also for slow-motion videos. The common frame rates are 30/60/120 fps. However, the commonly used settings are 1080p at 30fps.
You may like: Top 10 Best Sports & Action Video Cameras.
Step 2 – import media files
Before editing YouTube videos, you should first import media files into the VideoProc Vlogger interface. These media files may be video shots, images, subtitles, background music. VideoProc Vlogger supports all video, audio, and image files such as QuickTime, GIF, PSD, MP4, HDR, H.265/HEVC, H.264/AVC, Apple ProRes, etc. Users can just drag and drop the media files into the Media Library or press the “+” button for an easy shortcut way of importing media files.
Step 3 – Split and a rough edit
In the main interface of VideoProc Vlogger users will find many tracks. They can drag and drop media onto these tracks. There is the main video track, top overlay track, audio track, subtitle track, effect track. Users can add more tracks also. Users can now proceed to do basic video and audio editing. They can go on editing both, audio, and video simultaneously in VideoProc Vlogger.
Audio:
Users can split and delete unwanted audio that they do not want in their final video. They can mute the audio or enter the audio editor for enhanced audio editing. Here they can add fade-in or fade-out effects for the audio. If they want to go for more advanced levels of audio editing, they can go for audio mixing, Audio Equalizer, and other audio effects.
Video:
Users can drag video shots and see the video being played. They can delete sections of the video which they do not want. Users can add In and Out and select the sections they want to delete. They can add markers by right-clicking and choosing Add Marker in Clip, hitting the Split option, and choosing the Delete button on the keyboard to delete unwanted sections.
Step 4 – Change Video Speed
Users can change the speed of the video to make it more funny or entertaining. They can increase the speed or slow it to make slow-motion videos. VideoProc Vlogger supports both linear and non-linear video editing.
Speed change:
Users can select the video clip in the timeline and hit the Speed option. Alternatively, they can see the speed change by selecting the Speed menu in Inspector. Users can increase the speed up to 2x, 4x, 8x, or slow it to 1/8, 1/4, 1/2 and customize the speed of the video.
Speed Ramping:
VideoProc Vlogger allows users to use more 14 speed ramping presets to adjust the speed of the video. They need to select the clip in the timeline and hit Speed on the toolbar. A speed editor window will pop up where users can drag the play head and adjust the curve to select the preset speed. With the preset speed ramping tool, users can choose more options to customize the speed of the video.
Step 5 – Add transition
Users of VideoProc Vlogger can add transitions between the video clips. The transition tab in Media Library has all the transitions that users can bring in their video. Users have to simply drag and drop the transition in the timeline. Afterward, they can select the arrows and drag them in an increase or decrease the duration of the transition. They can also add a transition to their favorites. VideoProc Vlogger allows users to select transitions, Filters, Title / Subtitles as their favorite by clicking on the heart icon. It thus saves time.
Step 6 – Color correction
Users can apply color correction to the video clips and make the video more appealing. Color and Filter in Inspector let users do this. Here they can apply color contrasts, saturation, exposure, and other settings. 3D LUTs (wiki) in Color Editor offers even more options.
Step 7 – Add Filters
Filters add more dramatic effects to the video. Select Effects in Media Library and drag-and-drop them onto the timeline between the video clips. Users can adjust the length and duration of the effect.
Step 8 – Add titles / Subtitles
Users can choose to apply many types of titles and subtitles to their videos. Select Title tab in Media Library and they can see many templates of Titles, Subtitles, Credit Title. They can drag and drop them onto the subtitle track. They can align them to match the other video and audio segments in the other timelines. All they have to do next is to edit the title and subtitle. Click on Edit will bring up a lot of animations and text styles. Users can also adjust other things like colors, fonts, text position, vertical and horizontal alignment. Click on Apply when done. Adding markers on video tracks allows users to mark the footage where they can add the title and subtitles.
Step 9 – Preview or export video
When the editing is done, users can see a preview of the final video when they click on the Play button. Users can then export the video. By enabling “Enable hardware acceleration for encoding” will speed up the process of exporting the video. At this stage, users can choose the video quality, video codecs, audio format, video format. Click on the Start button to start exporting the video.
You may also like: How to Sell Video Courses without Allowing Buyers to Downloads?
Final Words

Creating YouTube videos is now so easy and fun when editing videos with VideoProc Vlogger. It has all the features, and it is free to download also. It is available for PC and Mac. This one software lets you edit audio and videos to no end and play around with presets that offer more creative options to YouTube videos creation. All its features are available for free, so there is no limit to creating videos. It’s very versatile and makes video editing more fun, while, at the same time, offering some serious advanced and pro video editing features. It’s a rich and user-friendly interface, which makes video editing smooth and easy.


