You own a restaurant or a small business, and you want to catch the mobile opportunity to engage your customers and maximize their loyalty? You may think that it will be expensive and that you need to hire a team of developers, but that’s where you’re wrong! There is an option so you can create a powerful and beautiful app for free. Just read the following step by step guide, and your restaurant will have an application in a flash!
1. Download Siberian CMS free Single-App Edition
 First, just download Siberian Single-App Edition. There is no trick; it’s really free! And it’s completely white label; there won’t be any Siberian advertisement in your app.
2. Install the Single-App Edition
 Now you have to install the app maker on your server. Don’t worry; it’s quite easy to achieve if you follow the documentation provided by Siberian. And if you feel like you’re not familiar enough with server management to do so, I recommend you to have a look at the survival guides offered here, and this will all seem like child’s play to you!
3. Choose the design of your application
 Now the fun part begins! You are going to choose the design of your app. First, either you can use a premade template with a background image and colors, or you can start from scratch. As you may already have some colors, you use for your company logo, or your menu, let’s say we will start from scratch here.
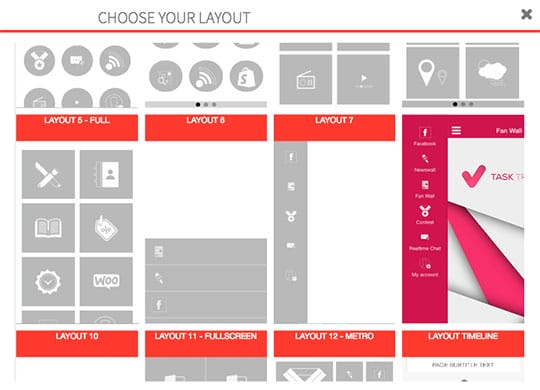
Let’s select a layout (the way the icons of your app will be displayed). As of now, there are more than 30 layouts available, so you have plenty of options!
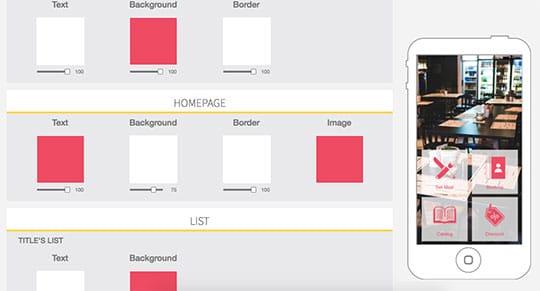
Then upload a homepage image for your app, select the country you are located in (this will also automatically set the currency) and choose a font style. When you’re done, just click on the “Colors” tab on top of the page. On this page, you will be able to select the colors of your app for basically everything. Use the live previewer on the right to see the result:
Once you’re happy with your colors, click on the “Features” tab.
4. Add your content
 There are many features available in Siberian CMS, but as a restaurant owner, you might not need all of them. So we will start by adding a few of them which could be interesting for your business and your customers.
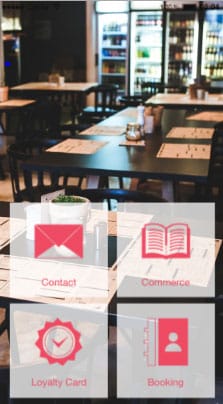
First, let’s add a Contact page for your restaurant. Fill in your phone number, address and everything you might want to display here from your website address to your Facebook page. This will allow your customers to contact you easily.
Now let’s add a Commerce feature. This feature will allow you to sell online directly from the application if you have a delivery or take-out service.
(Note that if you don’t have one of these services you can use the “Catalog” feature instead, which works basically the same way but hasn’t a payment gateway integrated. You will be able to display the different meals you offer for example.)
Add a store (you can add several stores if you own a restaurant chain for example), choose the delivery methods available, as well as the payment methods and the tax rate. Your store is now set up. Now let’s add your products.
You can create categories for your products like “Pizza” and “Pasta”, etc…
Now that you’ve created categories let’s add your products. You can add pictures, a description, product formats (small, medium, large, etc., you) so that your product’s page is as complete as you need.
You get the following result:
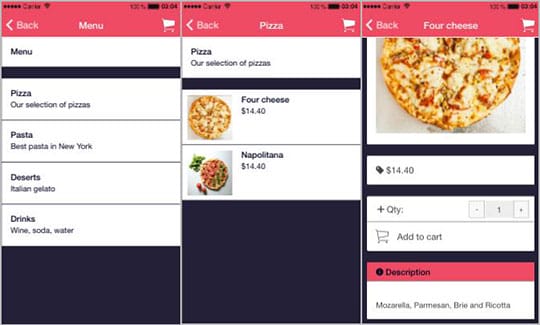
Your online store is ready.
Now let’s add a Loyalty card to reward your most loyal customers. Add the “Loyalty Card” feature, select how many points are needed to get the reward, what the reward will be. That’s it; you’re ready to go!
And finally, to finish with the basic needs of a restaurant, let’s add a “Booking” feature to allow your customers to book a table quickly from their mobile app.
You have the essential features required for a restaurant application now, but feel free to add any other feature you think would add value and engage your customers. There are so many to choose from, from image galleries to a fan wall where your users will be able to share experiences with each other with pictures and comments.
5. Prepare your app for the Android and iOS stores
 We’re close to the end! Click on “Application” tab on top of the page, and add an icon for your app which will be displayed in the main menu of your phone with all the other applications you have already installed. You also have to upload a startup image which will be displayed quickly when your customers open the app.
Now let’s get to the last step and click on the “Publication” tab. Fill in the description of your application for the app stores. Add a few keywords your customers will look for when they want to download your app.
When this is done, and you’re happy with your app, download the source code of your app, one for Android and one for iOS. This is it, the only thing left to do is to use the source codes you have downloaded to publish your app on the Google Play Store and the Apple App Store.
There you go, your restaurant has its own mobile application, and it only took you a few minutes!