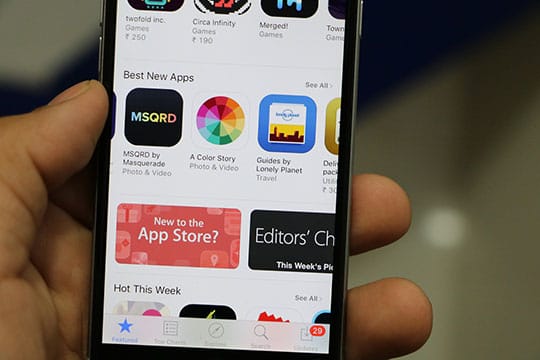
Even for developers with an extensive project portfolio, submitting an iOS app to the iOS App store can be a taxing experience. The reason for this is that iOS app developers don’t submit apps to the store on daily basis. After months of hard work, when you are pressed with deadlines and rushing to meet each requirement on Apple’s strict list of guidelines, mistakes are easy to make. Although these mistakes will not exactly undermine the complete iOS app development project success; they will cost stress, time, and eventually money.
Have you completed the iOS developer registration process? Enrolling in Apple’s iOS Developer Program is a prerequisite for submitting an app to the store. It seems pretty straightforward to assume that you’ve completed this step; but sometimes, small details like these are easy to overlook while you are engrossed in the iOS app development process and your attention is focused on coding; administrative procedures may be the last thing on your mind. If you haven’t completed this step, make sure to enroll in the program from the Apple Developer page before the submission.
Next, it’s time to check whether you meet the other basic submission requirements. These 5 tips will help you stay away from costly mistakes further down the line. Don’t submit your iOS app to the App Store unless you’ve completed the following minimal steps:
1. Testing
 As an iOS developer, you know how satisfying it is to write that last line of code. However, is this enough for finalizing the iOS app development product management process? The answer is no.
After wrapping up the final features specified in the iOS app, you need to do some rigorous testing. Apple may not have as many devices as Android, but over the years, the number of devices has grown significantly. Therefore, it’s recommended to test your app on as many devices you have access to.
Does the app crash frequently, show memory leaks, or have performance issues? Ask yourself these questions to avoid common issues such as apps that aren’t optimized for certain screen sizes. You might get different results depending on the device you’ve used to test the app with the iOS Simulator. An iPhone, for example, doesn’t have the same performance capacity as a Mac. Simply put, it’s better for you to notice the problems than to leave it to Apple or users who can respond with poor app reviews.
Recommended for you: Why Google Identity Program is a Must for Mobile App Developers?
2. Apple’s iOS App Store Guidelines
 Adhering to Apple’s submission guidelines is necessary to avoid having your app rejected an Apple provides substantial help in this area. The minimum you need to study is the content from the iOS Human Interface Guidelines and the iOS App Store Review Guidelines. As you can see, Apple maintains the strong user focus in this area too. If you fail to read the documents (and many developers skip exploring them in depth), your app can be rejected and you will need to repeat the procedure all over again.
Even if you don’t have time to read all provisions applicable to the iOS app development process, at least try consulting a summary. Here are a few helpful tips from the guidelines to help you avoid submission delays: don’t let your app crash or replicate the native app functionalities, be sure you own the copyright to any art you choose, avoid using private APIs, and under no circumstances should the app create data privacy issues such as allowing the camera or the phone work without the user’s permission. Of course, these tips don’t cover all the guidelines, but at least they will point you in the right direction.
3. App ID, Distribution Certificate, and Provisioning Profile
 The app identifier or the App ID can be either an explicit App ID used for single apps or a wildcard App ID used for building multiple apps. The wildcard App ID is convenient. But you won’t be able to use it in all situations; such as building an app that includes iCloud, push notifications or in-app purchases.
Before creating a provisioning profile and submitting your app to the iOS App Store, you need to have a distribution certificate. To create a distribution certificate, you need to follow a similar process to the one for obtaining a development certificate completed in the testing phase. In-depth information about certificates is available in the Code Signing your Apps guide.
For iOS app development projects that have a wildcard App ID, you can use the same provisioning profile for multiple apps. If you have an explicit app, you need to create a new provisioning profile.
4. Configure Settings
 After you’re done with the identifiers and the certificates, you should jump into configuring your target’s build settings in Xcode. This process includes choosing the right target from Project Navigator and updating the Code Signing section to Automatic. You can find the Signing section under the Build Settings tab. Once you’ve done this, you’ve cleared a serious hurdle in the submission process. However, there are a few more things you need to do.
5. Deployment Target
 To keep users happy, dedicate some time to set up the optimal deployment target for your app. The deployment target defines the minimum OS requirements for the app to function properly. If you choose to modify the deployment target when you submit updates later, it can affect the user experience of those who download the app but own devices that don’t meet the minimum OS required for app updates. When you increase the deployment target, try to warn users in advance. Also, setting up the deployment target to the latest iOS is a good practice for each new iOS app development project.
You may also like: Financial Apps Development: Top 7 Things to Consider.
Final Words
Making sure that everything works for a successful submission has several additional steps. For example, creating assets, filling out the basic app information and pricing as well as submitting the app binary. However, if you pay attention to these helpful tips, you can avoid most of these problems. This will save time and the added costs of going back to repeat certain steps. In the end, Apple makes frequent updates to the guidelines. So, it’s best to check them before you hit that submit button.
This article is written by Michael Kelley from Fueled. Michael is a professional tech writer and content strategist with an app development background. He specializes in Android & iOS app design, as well as blockchain & app technology. Ever since he was a child, Michael was captivated by technology. When the opportunity arose to spend his life writing about it, Michael didn’t hesitate. He now spends his time exploring and writing about captivating new technologies to introduce to the people.