Have you ever wondered why some video background removers look clean and natural, while others leave rough edges or odd color patches? The difference usually comes down to how well the video is optimized to understand the details in every frame.
In this article, we’ll explore how VMake actually improves and fine-tunes the background-removal process in videos.
We’ll also look at what makes Vmake AI Video Background Remover stand out, especially in handling complex elements, maintaining detail fidelity, and producing smoother results even when the footage is imperfect.
Why Optimizing Background Removal Matters in Video

When you’re working with moving footage, even the smallest detail can decide whether the final cut looks painfully artificial.
- Stable Edges Across Frames: A well-optimized model keeps outlines smooth and steady, avoiding the jittery edges that often appear when subjects move or turn.
- Consistent Color Preservation: Instead of shifting skin tones or altering clothing shades, optimized AI keeps colors natural and balanced as the background changes.
- Better Handling of Complex Details: Fine elements like hair strands, transparent objects, or textured fabrics are processed with higher accuracy, making the cutout look far more realistic.
- Less Manual Cleanup Needed: Since optimized AI produces cleaner masks and smoother transitions, creators spend far less time fixing edges or correcting errors frame by frame.
- Fewer Visual Artifacts During Motion: When the background removal is properly tuned, it reduces those tiny flickers or ghost-like outlines that tend to show up whenever someone moves quickly. This steadier output keeps the focus on the subject. Plus, it prevents those distracting glitches that usually break the viewer’s immersion.
Why VMake is an Ideal Choice for background removal from a video

Vmake stands out because its algorithm tracks the subject with more precision, especially around tricky areas like hair strands and subtle edge movements. It uses smart-object detection to understand what should stay in the frame and what counts as visual noise.
As a result, the important moments stay crisp while unnecessary elements disappear smoothly, without that rough cutout look many tools leave behind.
If you’ve ever struggled with messy edges or weird color jumps after removing a video background, VMake solves most of those headaches right out of the box.
- Smooth handling of moving subjects: Its AI follows motion from frame to frame, cutting down on flicker, jitter, and sudden mask jumps that usually ruin fast-moving shots. Everything stays steady and easy on the eye.
- Accurate color retention: Skin tones, clothing shades, and subtle shadows remain believable even after you swap the background. Nothing looks washed out.
- Reliable processing for complex scenes: Crowded spaces, overlapping elements, tricky lighting. VMake handles these with more confidence than most tools, keeping the subject clean.
- Less manual fixing afterward: Since the cutouts come out cleaner, you spend far less time making small adjustments. It frees you up to focus on the creative part instead of constant corrections.
Step-by-Step: Background Removal on VMake
Now that you know about VMake, let us now understand how you can remove the background from a video in VMake in seconds. Start by gathering your video and thinking about the look you want. Do you want transparency or a new background? Knowing that up front makes the rest faster. You may choose from any of the mov, mp4, m4v, 3gp, and even AV.
Step 1: Upload your video
Drag the file into VMake or click Upload. Big files take longer, so if you’re on a slow connection, consider a lower-res proxy. You may upload up to 3 files on the platform. Vmake processes your clip in a few seconds and clears the background automatically, giving you a clean green screen.
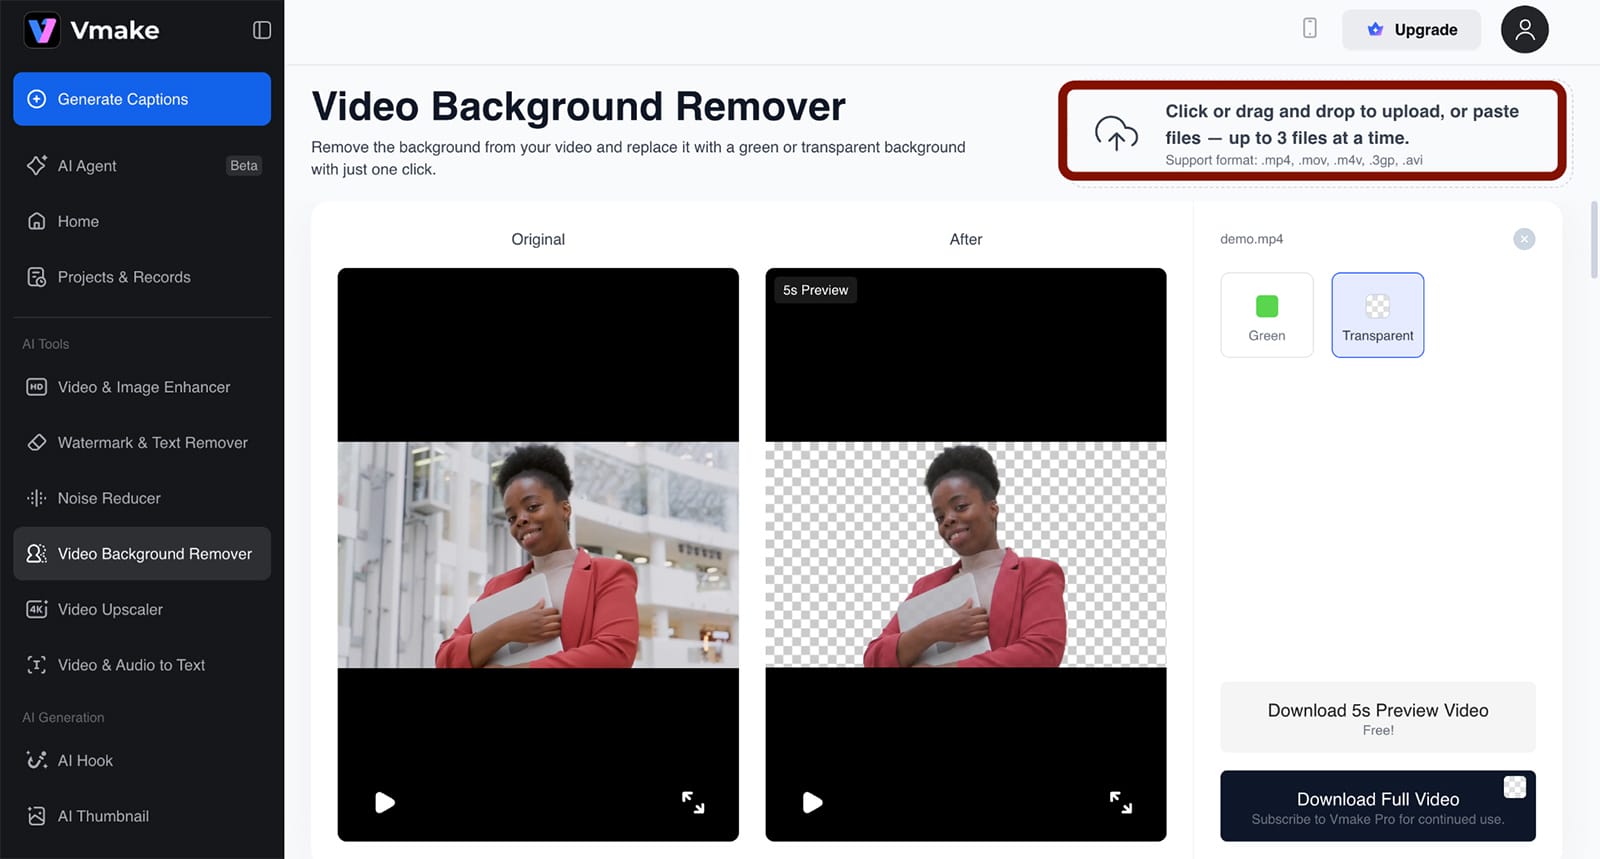
Step 2: Pick Greenscreen or Go Transparent
You can keep the green backdrop to a transparent one—just select the option you prefer and apply it.

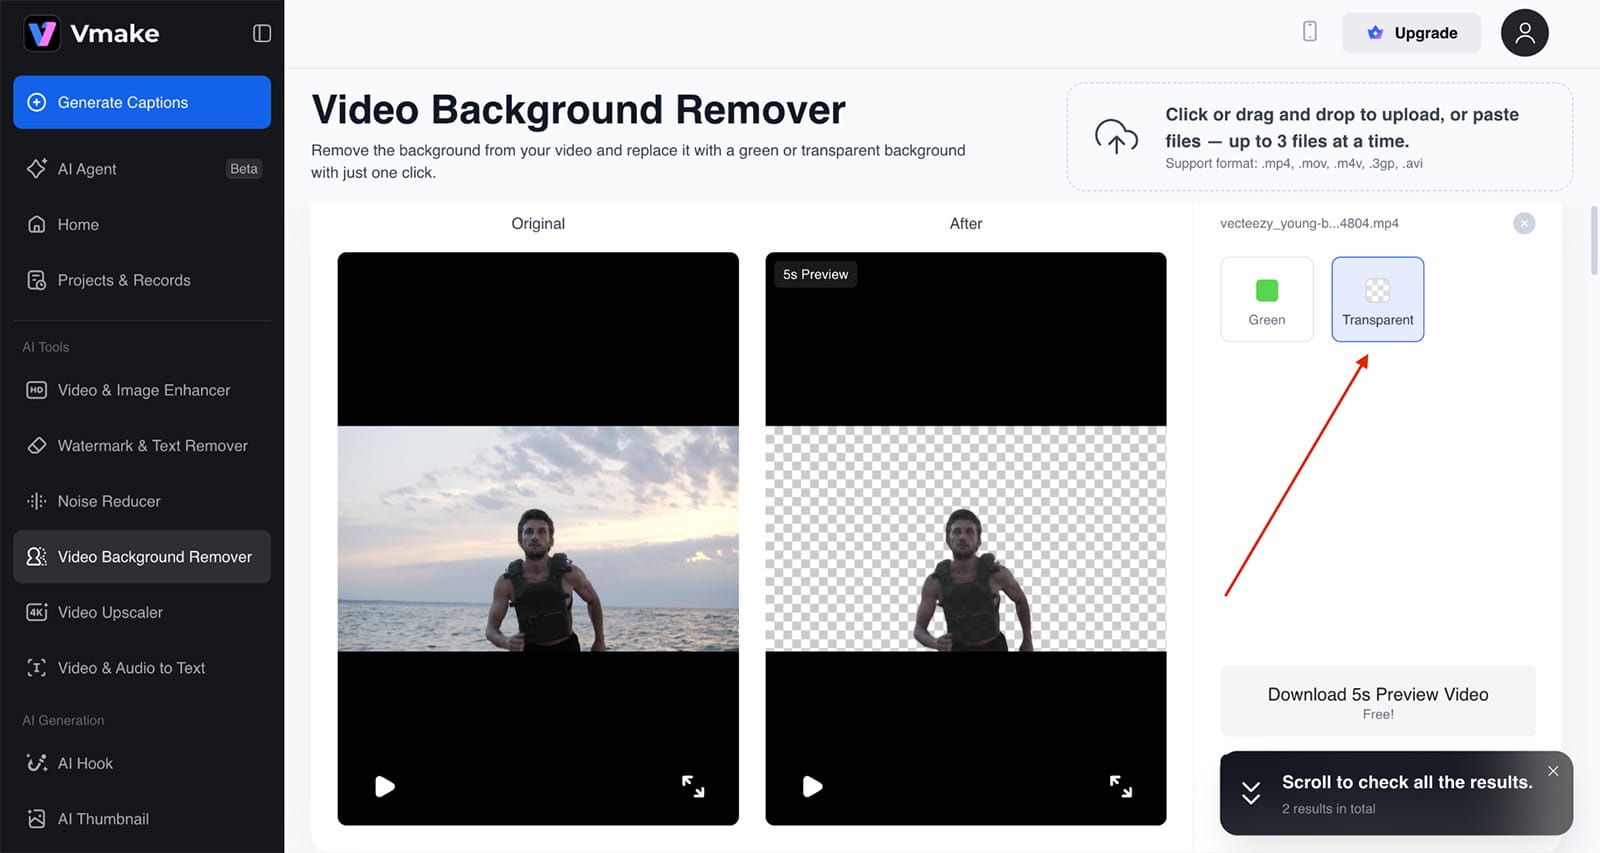
Step 3: Review and Adjust
Play the output to see if it matches what you had in mind. You can switch between backgrounds anytime.
Step 4: Download the Result
Once you’re happy, download the short preview. If you want the full-length video, simply upgrade to unlock the complete export.

As you can see in the final video has all the important elements intact, and even the smallest details from the athlete’s body have been preserved as they were. Plus, if you observe, the background elements, such as sand and sky, are effectively removed. Even, you edit the video further on a green screen or a solid background, the video will still look the same.
Best Practices for Removing Video Backgrounds with AI
If you want cleaner results, it helps to set up your footage in a way the AI can actually understand. A few small habits make a noticeable difference:
- Keep the lighting simple and steady: AI struggles when one side of the face is bright, and the other is in shadow. Soft, even lighting gives it a clear view of the edges.
- Don’t crowd the background: A messy backdrop makes it harder for the tool to figure out where the subject ends. Plain walls, simple textures, or anything low-contrast usually work best.
- Leave a little space around the subject: If the frame is too tight, hands or hair often get clipped when the person moves. A bit of breathing room helps the model track everything smoothly.
- Avoid sudden, sharp movements: Quick jumps or unpredictable motions can confuse the mask and cause flicker. Natural, steady movement keeps the outline clean.
- Use the highest resolution you can: More detail means the AI can separate strands of hair and soft edges without turning them into smudges.
- Always test a short section first: Before exporting the full clip, check the first few seconds. If you see flicker or halos, tweak things early instead of fixing them after the whole video renders.
Conclusion

That wraps up the basics of optimizing your clips. Now you know how to keep the quality intact and bring out the moments that matter using Vmake.ai. Clean backgrounds make a huge difference, but don’t forget to keep your overall video quality high from start to finish. And if you ever need full-fledged editing, whether it’s video watermark removal, enhancement, or upscaling, you may rely on VMake too.